Your Keto Plan is Ready! Click Here →

Advertisements

Mozzarella Cheese Sticks

Mozzarella Cheese Sticks might just be my love language. You know that sinking feeling when you crave something cheesy and crispy, but the frozen snacks from the store taste, honestly, a bit like cardboard? Been there. That’s exactly why I learned to make these mozzarella sticks at home. It’s simple, it’s cheap, it’s… okay, it might get your kitchen a bit messy, but let’s call that part of the fun. If you’ve been dying for stretchy, gooey cheese wrapped in perfect crunch—without the weird aftertaste—pull up a chair and let’s chat.

Mozzarella Cheese SticksGet Img & Url

Get Img & Recipe

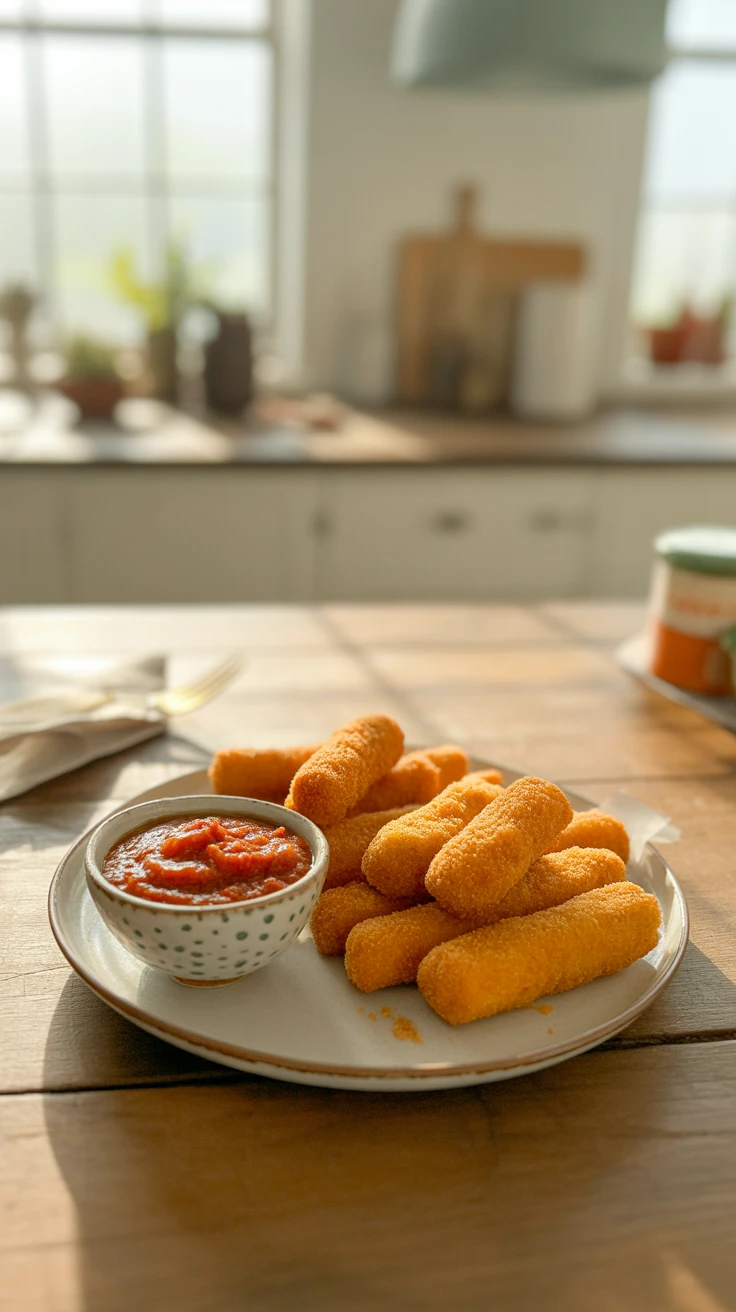
The Best Mozzarella Sticks Recipe

First thing’s first: not all mozzarella sticks are created equal. If you ask me, the best ones are hand-breaded and double-dipped, so the cheese stays tucked in while frying. I tried store-bought ones once… One word: disappointment. Homemade sticks come out golden and legit restaurant-worthy. All you need is a few grocery store basics and about 30 minutes.

Here’s my top tip: freeze the cheese sticks before frying. I know, I know—sounds over-the-top. But if you skip that? Regret. Cheese leaks everywhere, and you’ll end up with empty shells and heartbreak. Don’t make my rookie mistake.

Also, use panko breadcrumbs if you want that ridiculous crunch that sounds like you broke a rule biting into it. I’m picky about the dipping sauce, too (more on that in a sec), so don’t settle for boring old marinara if you’re feeling wild.

Oh, and another thing: don’t crowd your skillet or fryer, or the temperature drops and ruins the party. You want friends, not enemies, with crispy cheese.

I tried five different recipes, and this one was by far the easiest with the best results! My friends thought I’d ordered them from a five-star restaurant. Trust me, freezing is a game changer!

Mozzarella Cheese SticksGet Img & Url

Get Img & Recipe

What You Need

Let’s not overcomplicate things—most stuff is probably in your kitchen already. Grab:

  1. Mozzarella cheese sticks (the string cheese kind, yep)
  2. Flour (basic stuff works fine)
  3. Eggs
  4. Panko or regular breadcrumbs (but honestly, panko’s crunchier)
  5. Some kind of Italian seasoning—or at least salt, pepper, and garlic powder
  6. Cooking oil (vegetable oil works, nothing fancy)

For equipment, just something to fry with, a few shallow bowls for dredging, and that’s seriously it. If you can cut string cheese in half, you’re qualified for this recipe.

Mozzarella Cheese Sticks

How to Make Mozzarella Sticks

First, take those mozzarella sticks and cut them in half. You want ‘em bite-sized (unless you really love a jumbo stick, no judgment).

Line up three bowls. Flour in one. Beaten eggs in the next. Breadcrumbs mixed with seasoning in the third. It’s like an assembly line for food that will make you happy.

Roll each cheese stick in the flour (pretend you’re giving it a little coat), then dunk it in the egg, then coat it in the breadcrumbs. Want extra crunch? Dip it in the egg and breadcrumbs again.

Toss them all on a plate and freeze for at least an hour. Sounds annoying, but I’m telling you, it’s crucial.

When you’re ready, heat up your oil on medium. The cheese sticks only need to sizzle about 1-2 minutes (seriously, don’t walk away or get distracted by your phone). Scoop them out when golden.

Drain on paper towels, so you don’t get greasy fingers.

Mozzarella Cheese Sticks

Mozzarella Sticks Sauce

You can go classic with warm marinara (honestly, it’s a classic for a reason), or you could get crazy with ranch, chipotle mayo, or even honey mustard if you’re a rule breaker. No shame.

Here’s a plot twist: sometimes I just dump a pile of hot sauce on the side because why not? If you want to feel fancier, sprinkle fresh parsley on your sauce for some color. Sauce is honestly half the fun with mozzarella cheese sticks. Try a few and see which one you vibe with.

How to Store Mozzarella Sticks

Honestly, leftover mozzarella sticks rarely exist in my house, but if you manage not to eat them all… stick them in an airtight container in the fridge. They can last about three days. If you want them to last longer, freeze them again.

When reheating, skip the microwave (unless you like sad, soggy cheese). Oven or air fryer is key—pop them in at about 400°F for 5-7 minutes. Let them get crispy again!

Serving Suggestions

  1. Pile next to a big bowl of pasta to fake an Italian night at home
  2. Add to a game day spread with wings and sliders
  3. Cut in little bites for party finger food (kids go wild for these)
  4. Personal favorite: late-night snack while binge-watching your current show

Common Questions

Q: Can I use fresh mozzarella?

A: Hmmm—not really. It’s too soft and wet. Stick with the pre-packaged string cheese for best results.

Q: Can I bake these instead of frying?

A: You can. They’ll be healthier, but less crispy. Brush with oil and bake at 425°F, flipping once.

Q: Any way to make them gluten-free?

A: Sure! Grab gluten-free panko or make your own crumbs out of GF bread.

Q: Why did my cheese sneak out while frying?

A: Bet you didn’t freeze them long enough, or maybe your oil wasn’t hot enough. That step’s a must.

Q: Can I prep in advance for a party?

A: Absolutely. Get them breaded and freeze until ready to fry, then cook right before guests arrive for best taste.

This Will Be Your New Snack Obsession

That’s the long and short of how to make killer mozzarella cheese sticks at home. You’ve got the recipe, the tricks, and a few real-life foibles to dodge (trust me on that freezer step). Give these a try next time you want something better than bagged snacks—nothing impresses friends more than homemade cheese sticks, hand to heart. If you want more cheesy ideas, check this homemade mozzarella guide for nerding out further. Happy frying and don’t forget extra napkins!

Mozzarella Cheese Sticks

Keto-Friendly Cottage Cheese Bagels

Ah, the bagel—its warm, chewy goodness is often synonymous with weekend brunch and lazy mornings. But what if you’re following a keto diet and missing out on this satisfying staple?

As someone who has navigated the ups and downs of low-carb living, I can tell you that discovering keto-friendly alternatives can be a game-changer. One such gem in my recipe arsenal is the Keto-Friendly Cottage Cheese Bagels, a creation that’s not just a substitute but a delicious standalone treat.

These bagels are not only low in carbs but also rich in protein, thanks to the creamy cottage cheese. The crispy exterior gives way to a perfect chewy interior, making them a unique addition to your breakfast table. Whether you’re spreading cream cheese, slathering on avocado, or simply enjoying them plain, these bagels will leave you pleasantly satisfied.

Why Make This Recipe?

If you’re on the fence about trying these cottage cheese bagels, here are some compelling reasons to go for it:

  • Easy and Quick to Make: This recipe comes together in about 30 minutes, making it perfect for those busy mornings when you need a quick bite.
  • Budget-Friendly: With only a handful of ingredients, these bagels won’t break the bank. Plus, you can make multiple servings at once!
  • Healthy and Diet-Friendly: Packed with protein and low in carbs, these bagels are a great choice for anyone on a keto or low-carb diet.
  • Customizable: You can easily adapt this recipe by adding your favorite spices or toppings, making it versatile for various tastes.

How to Make Keto-Friendly Cottage Cheese Bagels

Ingredients

Keto-Friendly Cottage Cheese Bagels

A soft, chewy bagel that’s low in carbs and high in protein — these cottage cheese bagels are perfect for a keto-friendly breakfast or snack. Quick to make, highly customizable, and incredibly satisfying!

Equipment

  • Mixing bowl
  • Baking sheet
  • Parchment paper
  • Oven
  • Measuring cups and spoons
  • Spoon or spatula
  • Hands (for shaping the bagels)

Ingredients
  

  • 1 cup cottage cheese or substitute ricotta cheese or Greek yogurt
  • 1 cup almond flour or use coconut flour — reduce quantity as it absorbs more liquid
  • 2 large eggs or flax eggs for a vegan option
  • 1 teaspoon baking powder or baking soda with an extra pinch of salt
  • 1/2 teaspoon salt adjust to taste

Instructions
 

  • Preheat oven to 375°F (190°C).
  • In a mixing bowl, combine cottage cheese, almond flour, eggs, baking powder, and salt. Mix well until smooth and no cottage cheese lumps remain.
  • Divide the dough into 4 equal portions. Shape each one into a bagel (form a ring with a hole in the center).
  • Line a baking sheet with parchment paper. Place the bagels on it.
  • Bake for 20–25 minutes or until golden brown.
  • Let them cool slightly. Enjoy warm, or store for later!

Notes

Serving Ideas:
Top with cream cheese, avocado, or smoked salmon. Slice for an egg sandwich or toast it with butter.
Storage:
Refrigerate in an airtight container for 4–5 days. Freeze for up to 3 months. Reheat in the oven or microwave.
Tips:
Avoid overmixing, use fresh baking powder for best rise, and customize with garlic powder, herbs, or shredded cheese.
Air Fryer Option:
Cook at 350°F (175°C) for 10–15 minutes until golden.

Directions

  1. Preheat your oven to 375°F (190°C). This is crucial to achieve that golden, crispy exterior.
  2. In a mixing bowl, combine the cottage cheese, almond flour, eggs, baking powder, and salt. Mix until a cohesive dough forms. Make sure there are no lumps of cottage cheese left; you want a smooth texture for the best bagels.
  3. Divide the dough into four equal portions. Using your hands, shape each portion into a bagel form by creating a hole in the center. This step is crucial for achieving that classic bagel shape.
  4. Arrange the bagels on a baking sheet lined with parchment paper. This will prevent sticking and make cleanup a breeze.
  5. Bake in the oven for 20-25 minutes, or until they turn a lovely golden brown. Keep an eye on them towards the end to ensure they don’t overbake.
  6. Let them cool for just a moment before diving in! They are best enjoyed warm, but you can store them for later.

How to Serve Keto-Friendly Cottage Cheese Bagels

These keto-friendly bagels can be enjoyed in a multitude of ways:

  • Classic Spread: Top your bagel with cream cheese and fresh herbs, or try it with smoked salmon for an upscale breakfast।
  • Avocado Toast Twist: Mash some avocado with lime and salt, and spread it on your bagel for a refreshing twist.
  • Egg Sandwich: Slice the bagel in half and fill it with a fried egg, turkey bacon, and spinach for a hearty meal.

Pair your bagels with a hot cup of coffee or a refreshing herbal tea, and you’re all set for a delightful breakfast or snack!

How to Store Keto-Friendly Cottage Cheese Bagels

To keep your bagels fresh:

  • Refrigeration: Store leftover bagels in an airtight container in the refrigerator for up to 4-5 days.
  • Freezing: For longer storage, freeze the bagels flat in a single layer on a baking sheet. Once frozen, transfer them to a freezer-safe bag or container. They can be frozen for up to 3 months.

Reheating Tips:

  • Oven: Preheat your oven to 350°F (175°C) and heat the bagels for about 10 minutes to get them warm and crispy again.
  • Microwave: If you’re in a hurry, you can microwave them for about 15-30 seconds, though they may lose some of their texture.

Tips to Make Keto-Friendly Cottage Cheese Bagels Perfectly

  1. Add Flavor: Spice up the dough by adding garlic powder, onion powder, or herbs to enhance the flavor profile.
  2. Avoid Overmixing: Mix just until combined. Overmixing can lead to tough bagels.
  3. Use Fresh Ingredients: Ensure your baking powder is fresh for optimal rise. Old baking powder can result in dense bagels.
  4. Thickness Matters: Make sure your bagels are evenly shaped and not too thick. This ensures even baking and the right texture.
  5. Experiment: Don’t hesitate to try different variations like adding shredded cheese or sliced olives for a savory twist.

Variations

  • Vegan Option: Substitute eggs with flax eggs (1 tablespoon ground flaxseed mixed with 3 tablespoons water = 1 egg) and use almond milk cottage cheese.
  • Gluten-Free Adaptation: Almond flour is already gluten-free, but ensure all other ingredients are certified gluten-free.
  • Low-Carb Additions: Add some seeds or nuts into the dough for extra healthy fats and crunch without adding too much to the carb count.

Frequently Asked Questions (FAQ)

Can I make Keto-Friendly Cottage Cheese Bagels ahead of time?

Yes! These bagels are great for meal prep. You can make them ahead and store them in the refrigerator or freeze them for later use.

What are the best substitutes for almond flour?

You can use coconut flour, but remember to adjust the quantity since coconut flour absorbs more moisture. A rule of thumb is to use ¼ of the amount of almond flour.

Can I cook this recipe in an air fryer?

Absolutely! Air fryers work wonderfully for this recipe. Preheat your air fryer to 350°F (175°C) and cook for 10-15 minutes, checking for doneness.

Conclusion

These Keto-Friendly Cottage Cheese Bagels are a fantastic way to enjoy a beloved breakfast classic without the carbs. Easy to make, delicious, and customizable, they’re perfect for anyone looking to add variety to their keto diet. I encourage you to give this recipe a try and discover how satisfying a guilt-free bagel can be!

Share your experiences in the comments below, and don’t forget to rate the recipe or share it on social media. Happy baking!

Cheesy Chicken and Broccoli Patties

There’s something truly nostalgic about biting into a homemade patty filled with cheesy goodness and vibrant greens.

Growing up, my family often made patties during the colder months, and they were always a hit. The combination of juicy chicken, gooey cheese, and wholesome broccoli not only fills your belly but also warms your heart. This Cheesy Chicken and Broccoli Patties recipe is special because it brings together these beloved flavors in one easy-to-make dish that the entire family will love.

Imagine the texture: crispy on the outside, tender and cheesy on the inside, and a medley of flavors dancing on your taste buds. Not only does this dish celebrate comforting ingredients, but it also offers a nutritious twist—making it a unique and delightful addition to your mealtime rotation.

Why Make This Recipe?

Here are a few reasons why you’ll want to whip up these Cheesy Chicken and Broccoli Patties:

  • Easy and Quick to Make: This recipe comes together in no time, making it perfect for weeknight dinners or quick lunches.
  • Budget-Friendly: With simple ingredients that are often already in your pantry, this dish is kind to your wallet.
  • Family Favorite: Packed with flavor and made with ingredients that kids love, these patties can turn mealtime into a joy for everyone at the table.
  • Healthy Option: Combining lean chicken and broccoli, these patties offer a nutritious meal that doesn’t compromise on taste.

How to Make Cheesy Chicken and Broccoli Patties

Ingredients

Cheesy Chicken and Broccoli Patties

These Cheesy Chicken and Broccoli Patties are a delicious, low-carb way to enjoy comfort food without the guilt. Packed with lean protein and gooey cheese, they’re perfect for meal prep, lunchboxes, or a quick weeknight dinner.
Prep Time 10 minutes
Cook Time 15 minutes
Total Time 24 minutes
Servings 4

Equipment

  • Mixing bowl
  • Frying pan or skillet
  • Spatula
  • Grater (for cheese)
  • Knife & cutting board

Ingredients
  

  • 2 cups cooked chicken breast shredded or finely chopped
  • 1 cup cooked broccoli chopped
  • 1/2 cup shredded cheddar cheese
  • 1/4 cup grated Parmesan cheese
  • 2 eggs
  • 1/4 cup almond flour or breadcrumbs if not low-carb
  • 1/2 tsp garlic powder
  • 1/2 tsp onion powder
  • Salt and pepper to taste
  • 2 tbsp olive oil for frying

Instructions
 

  • In a large mixing bowl, combine chicken, broccoli, cheddar, Parmesan, eggs, almond flour, garlic powder, onion powder, salt, and pepper.
  • Mix well until all ingredients are combined and a sticky dough forms.
  • Shape into small patties (about 8–10 depending on size).
  • Heat olive oil in a skillet over medium heat.
  • Fry patties for 3–4 minutes on each side until golden brown and heated through.
  • Drain on paper towels if needed. Serve warm.

Notes

Great for using up leftover chicken or broccoli.
To make them crispier, coat lightly in almond flour before frying.
Can be baked instead of fried at 400°F (200°C) for 15–20 minutes.
Each patty has approximately 23g protein and 4g net carbs.
Nutrition Facts (per serving)
Based on a serving size of 231g (approximately 4 patties):
RecipeTin Eats
Calories: 461 kcal
Protein: 23g
Total Fat: 31g
Saturated Fat: 10g
Carbohydrates: 11g
Fiber: 2g
Sugar: 2g
Sodium: 800mg
Cholesterol: 120mg
Calcium: 200mg
Iron: 2mg
Potassium: 350mg
{{MetaTags.title || ‘Nutritionix’}}
+5
RecipeTin Eats
+5
Glamour
+5
starinfinitefood.com
+7
Healthyish Foods
+7
Meal Plan Addict
+7
H-E-B | Here Everything’s Better
Note: Nutritional values are approximate and can vary based on specific ingredients and portion sizes.

Note: You can substitute ground chicken with ground turkey or even cooked quinoa for a vegetarian version. If you can’t find smoked gouda, regular gouda or mozzarella works well too!

Directions

  1. Preheat your oven to 425°F (220°C) to ensure that your patties bake evenly and come out wonderfully crispy.
  2. In a large mixing bowl, combine the ground chicken, chopped broccoli, smoked gouda, cheddar cheese, eggs, and seasonings. Mix well until all ingredients are fully incorporated. (Pro tip: If the mixture feels too wet, consider adding a tablespoon of breadcrumbs for better binding.)
  3. Form the mixture into patties (about ½ inch thick) and place them on a baking sheet lined with parchment paper. Ensure they are spaced apart to allow even cooking.
  4. Bake for 20-25 minutes, or until the patties are golden brown and cooked through. You can flip them halfway through to achieve an even crispiness.
  5. Serve warm with a dollop of sour cream or your favorite sauce for dipping!

How to Serve Cheesy Chicken and Broccoli Patties

Here are a few fun serving ideas to elevate your meal:

  • With a Side Salad: Pair these patties with a fresh mixed greens salad drizzled with a light vinaigrette for a nutritious contrast.
  • In a Wrap: Place the cooked patties in a whole-grain wrap with lettuce, tomato, and a smear of your favorite dressing for a delicious, handheld meal.
  • Accompanied by Dipping Sauces: Serve with ranch dressing, sriracha sauce, or tzatziki for added flavor.

How to Store Cheesy Chicken and Broccoli Patties

Proper storage will help keep your patties fresh for longer:

  • Refrigeration: Store any leftovers in an airtight container in the fridge for up to 3 days.
  • Freezing: For longer storage, place cooked patties in a single layer on a baking sheet to freeze. Once frozen, transfer them to a freezer zip-top bag where they can last up to 3 months.
  • Reheating: To reheat, bake from frozen at 375°F (190°C) for 25-30 minutes or until heated through, or microwave for 1-2 minutes, checking to ensure they are hot in the center.

Tips to Make Cheesy Chicken and Broccoli Patties Perfectly

  1. Season Generously: Don’t be shy with the spices; they elevate the flavor profile. Taste the raw mixture and adjust seasonings to your liking.
  2. Moisture Control: Make sure your broccoli is well-drained after chopping—excess moisture can lead to soggy patties.
  3. Uniform Patty Size: Aim for uniform sizing to ensure even cooking. You can use an ice cream scoop for consistent portions.
  4. Cooking Techniques: For a crispier exterior, consider pan-frying the formed patties in a bit of olive oil for 3-4 minutes on each side before baking.
  5. Customizing Flavors: Incorporate herbs like dill or parsley for an extra zing or swap out the cheeses based on your preference!

Variations

Looking to mix things up? Here are a few variations to try:

  • Vegan/Vegetarian Version: Substitute ground chicken with cooked lentils or jackfruit and use flax eggs instead of regular eggs.
  • Gluten-Free Adaptation: Ensure your breadcrumbs, if used, are gluten-free, or skip them altogether if you want a low-carb option.
  • Spicy Kick: Add some chopped jalapeños or a pinch of cayenne pepper to the mix for a spicy version that packs more heat!

Frequently Asked Questions (FAQ)

Can I make Cheesy Chicken and Broccoli Patties ahead of time?

Absolutely! You can prepare the mixture in advance and form the patties. Store them in the fridge for up to 24 hours before baking.

What are the best substitutes for ground chicken?

Ground turkey and even finely minced mushrooms work great as substitutes if you’re looking for alternatives.

Can I cook this recipe in an air fryer?

Yes! Preheat the air fryer to 375°F (190°C) and cook the patties for about 12-15 minutes, flipping halfway through.

Conclusion

Cheesy Chicken and Broccoli Patties are not just delicious; they capture the essence of homemade comfort food in a nutritious package. This recipe is perfect for any night of the week and is sure to be a hit with family and friends. Don’t hesitate to give it a try—your taste buds will thank you!

I encourage you to share your experience with this recipe. Feel free to leave a comment, rate the recipe, or share your creations on social media. Happy cooking!

Philly Cheese Steak Casserole

Introduction

Growing up, the mere mention of a Philly cheese steak would have my mouth watering. I remember the bustling streets of Philadelphia, where food carts served up the most delectable and satisfying sandwiches, each bite a perfect blend of flavors.

The rich aroma of grilled steak combined with sautéed peppers, onions, and melted cheese created a wave of nostalgia, transporting me back to those lively summer days. If you’re looking for a dish that captures the spirit of a classic Philly cheese steak, then this casserole is for you.

This Philly Cheese Steak Casserole brings all those beloved flavors together in a hearty, easy-to-make dish that your whole family will adore. With its creamy texture, savory notes, and that glorious layer of melted provolone cheese, it’s comfort food at its finest. It’s truly special because it allows you to enjoy the flavors of a steak sandwich in a fun and unique way, making it perfect for weeknight dinners or gatherings with friends.

2. Why Make This Recipe?

If you’re still on the fence about trying this recipe, here are a few compelling reasons:

  • Easy and Quick to Make: This casserole comes together quickly, making it a perfect choice for busy evenings. With minimal prep and cook times, you’ll have dinner on the table in no time!
  • Budget-Friendly: Utilizing ingredients like ground hamburger and bell peppers keeps the recipe affordable without sacrificing taste.
  • Family Favorite: This comforting dish appeals to both kids and adults alike. It’s a surefire way to please a crowd, and leftovers (if there are any!) are just as delicious.

3. How to Make Philly Cheese Steak Casserole

Now that you’re convinced, let’s dive into the step-by-step process of making this delightful casserole!

Ingredients

Philly Cheese Steak Casserole

This Philly Cheese Steak Casserole brings all the savory, cheesy goodness of a classic Philly sandwich into a creamy, comforting, easy-to-make casserole. Ideal for busy weeknights, family dinners, or casual gatherings.
Servings 6 servings

Equipment

  • Large skillet
  • Knife & cutting board
  • 9×13-inch casserole dish
  • Oven
  • Mixing spoon or spatula

Ingredients
  

  • Make Ahead: Assemble a day ahead refrigerate, and bake when ready.
  • Storage: Refrigerate up to 4 days or freeze up to 3 months. Reheat at 350°F until warmed through.
  • Variations: Add mushrooms or zucchini for more veggies. Use turkey or plant-based ground meat for variation.
  • Keto-Friendly: Naturally low in carbs and high in fat—ideal for keto.
  • Nutrition per serving, approx. 6 servings total:
  • Calories: 370
  • Fat: 28g
  • Protein: 24g
  • Total Carbs: 6g
  • Fiber: 1g
  • Net Carbs: 5g

Instructions
 

  • Cook the Meat: In a skillet over medium heat, cook ground beef until browned. Drain excess grease.
  • Sauté Veggies: Add sliced onions and bell peppers. Sauté until softened (5–7 mins).
  • Season Everything: Stir in seasoning, paprika, garlic powder, salt, and pepper.
  • Add Creaminess: Mix in cream cheese until smooth. Pour in chicken broth and stir.
  • Layer & Top: Transfer to greased casserole dish. Lay provolone slices evenly on top.
  • Bake: Preheat oven to 350°F (175°C). Bake uncovered for 15–20 mins until cheese is bubbly and golden.
  • Serve: Garnish with fresh herbs if desired. Serve hot!

Notes

Make Ahead: Assemble a day ahead, refrigerate, and bake when ready.
Storage: Refrigerate up to 4 days or freeze up to 3 months. Reheat at 350°F until warmed through.
Variations: Add mushrooms or zucchini for more veggies. Use turkey or plant-based ground meat for variation.
Keto-Friendly: Naturally low in carbs and high in fat—ideal for keto.
Nutrition (per serving, approx. 6 servings total):
Calories: 370
Fat: 28g
Protein: 24g
Total Carbs: 6g
Fiber: 1g
Net Carbs: 5g

Directions

  1. Cook the Hamburger: In a large skillet, cook the ground hamburger over medium heat until browned. Ensure to drain any excess grease to keep the casserole from becoming too oily.
  2. Sauté the Vegetables: Add the sliced onions and bell peppers to the skillet. Cook until they are soft and fragrant, about 5-7 minutes.
  3. Season the Mixture: Sprinkle in the salt, pepper, Italian seasoning, smoked paprika, and garlic powder. Stir well to combine all the spices and evenly distribute the flavors.
  4. Add Creaminess: Reduce the heat to low and mix in the cream cheese until it’s melted and creamy. Pour in the chicken broth and continue stirring until everything is well mixed.
  5. Transfer to Casserole Dish: Carefully transfer the savory mixture into a greased casserole dish, ensuring it’s spread evenly.
  6. Add Cheese: Lay the provolone cheese slices generously on top, covering the filling completely for that melty goodness.
  7. Bake: Preheat your oven to 350°F (175°C) and bake the casserole for about 15-20 minutes, or until the cheese is melty and golden.

4. How to Serve Philly Cheese Steak Casserole

Serving your Philly Cheese Steak Casserole is easy and can be enhanced with a few complementary sides.

  • Classic Pairings: Serve with a side salad for freshness or crispy French fries for a true indulgence.
  • Presentation Tips: Garnish with fresh parsley or chives for a pop of color and an added flavor dimension. You could also serve the casserole with crusty hoagie rolls for a fun, interactive meal.
  • Drink Suggestions: Pair with a cold beer or a refreshing iced tea to balance out the richness of the dish.

5. How to Store Philly Cheese Steak Casserole

To ensure your casserole stays fresh:

  • Refrigeration: Store leftovers in an airtight container in the refrigerator for up to 3-4 days.
  • Freezing: If you want to save it longer, you can freeze the casserole for up to 3 months. Just make sure to wrap it tightly in plastic wrap and then in aluminum foil.
  • Reheating: To reheat, simply thaw it overnight in the fridge if frozen, then bake at 350°F (175°C) until heated through, usually about 20-25 minutes.

6. Tips to Make Philly Cheese Steak Casserole Perfectly

  • Enhancing Flavor: Add a splash of Worcestershire sauce while cooking the hamburger for an extra umami kick.
  • Common Mistakes: Avoid overcrowding the skillet when browning the hamburger; cook in batches if necessary to achieve a nice sear.
  • Texture Tips: For a crispier top, consider adding breadcrumbs mixed with a bit of butter before baking.
  • Cheese Choices: Experiment with a mix of cheeses for different flavors—Pepper Jack would add an exciting kick!
  • Veggie Variations: Feel free to add mushrooms or zucchini for additional texture and flavor.

7. Variations (If Any)

To cater to various dietary needs, consider these adaptations:

  • Vegan Version: Replace the ground hamburger with lentils or a plant-based meat substitute. Use vegan cream cheese and cheese alternatives for a fully vegan dish.
  • Gluten-Free: This recipe is naturally gluten-free; just ensure you check your broth and cheese brands.
  • Low-Carb/Keto Version: Swap the cream cheese with a cream-based sauce and omit any starchy sides for a keto-friendly meal.

8. Frequently Asked Questions (FAQ)

1. Can I make Philly Cheese Steak Casserole ahead of time?

Absolutely! You can prepare the casserole in advance, cover it with foil, and store it in the refrigerator. Just warm it up when you’re ready to bake.

2. What are the best substitutes for hamburger?

Ground turkey or chicken work well as substitutes for a leaner option. You can also use plant-based alternatives for a vegetarian option.

3. Can I cook this recipe in an air fryer?

While this recipe is best baked traditionally, you can adapt it for the air fryer by cooking the beef and veggies separately and then combining them with cheese in an air fryer-safe dish.

9. Conclusion

This Philly Cheese Steak Casserole is bound to become a go-to recipe in your household, blending nostalgia with delicious flavors into a straightforward dish. It’s a satisfying and comforting meal that is sure to impress, whether it’s a weeknight dinner or a casual get-together with friends.

I encourage you to try this recipe; your taste buds will thank you! If you do, leave a comment, rate the recipe, or share your culinary masterpiece on social media. Let’s see your take on this cheesy, savory delight!

Low Carb Pizza Squares

There’s something undeniably satisfying about pizza, isn’t there? The gooey cheese, the savory toppings, and the crispy crust create a symphony of flavors that dance on the palate. However, if you’re navigating a low-carb lifestyle, traditional pizza often feels like a guilty pleasure you have to forgo.

I remember a time when Friday nights revolved around ordering a hot pizza and curling up for a movie. But over time, I found myself yearning for a way to enjoy those cherished moments without straying from my dietary goals.

Enter Low Carb Pizza Squares—a delectable, guilt-free alternative that captures all the classic flavors of pizza while keeping things low on carbs. Imagine a golden, cheesy base topped with your favorite pepperoni and a side of pizza sauce for dipping. It’s not just another recipe; it’s a delicious reminder that you don’t have to sacrifice flavor or fun to lead a healthier lifestyle.

Why Make This Recipe?

Here’s why you’ll love making Low Carb Pizza Squares:

  • Easy and Quick to Make: With just a few ingredients and simple steps, you can whip this up in under 30 minutes—perfect for a busy weeknight or last-minute gatherings.
  • Budget-Friendly: Using everyday ingredients like cheese and eggs, this recipe won’t break the bank, making it a great option for both families and individuals.
  • Family Favorite: Whether you’re cooking for kids or adults, this dish is sure to please everyone. It’s a fun, interactive way to enjoy pizza, and who doesn’t love finger food?
  • Healthy or Diet-Friendly: With a focus on low-carb ingredients, these Pizza Squares are ideal for keto, gluten-free, or low-carb diets without skimping on flavor.

How to Make Low Carb Pizza Squares

Ready to dive into the kitchen? Let’s get cooking!

Ingredients

Low Carb Pizza Squares

Enjoy the full flavor of pizza without the carbs! These Low Carb Pizza Squares are cheesy, crispy, and perfect for anyone following a keto, low-carb, or gluten-free lifestyle. Ready in just 30 minutes and perfect for weeknight dinners, appetizers, or lunchboxes.

Equipment

  • Mixing bowl
  • Spoon or spatula
  • Parchment paper
  • Baking sheet or cookie sheet
  • Oven
  • Knife (for slicing squares)

Ingredients
  

  • 2 cups shredded mozzarella cheese
  • 2 cups grated Parmesan cheese
  • 2 large eggs
  • 2 teaspoons Italian seasoning
  • Pepperoni slices as desired
  • Pizza sauce for dipping; store-bought or homemade

Instructions
 

  • Preheat oven to 350°F (175°C).
  • In a large mixing bowl, combine mozzarella, Parmesan, eggs, and Italian seasoning. Mix until just combined.
  • Line a baking sheet with parchment paper. Spread the mixture evenly into a rectangle or square.
  • Top with pepperoni slices or other toppings of choice.
  • Bake for 25 minutes, or until the top is golden and bubbly.
  • Let it cool slightly, then cut into squares. Serve warm with pizza sauce for dipping.

Notes

Notes
Customize with your favorite toppings: mushrooms, olives, bell peppers, or cooked sausage.
For extra flavor, add a pinch of garlic powder or chili flakes to the base.
For a crispier crust, bake for an extra 3–5 minutes before adding toppings.
Can be made ahead and reheated for quick snacks or lunches.
Nutrition Information (per serving — approx. 1/8 of recipe)
(Estimated values; may vary based on specific ingredients)
Calories: 210
Total Fat: 16g
Saturated Fat: 8g
Carbohydrates: 2g
Fiber: 0g
Net Carbs: 2g
Protein: 15g
Sugar: <1g Sodium: 520mg

Directions

  1. Preheat your oven: Set it to 350°F (175°C).
  2. Mix the base: In a mixing bowl, combine the shredded mozzarella, grated Parmesan, eggs, and Italian seasoning. Stir until well combined.
  3. Spread the mixture: On a parchment-lined cookie sheet, evenly spread the cheese and egg mixture, forming a rectangle or square base.
  4. Top with toppings: Lay out the pepperoni slices on top, or get creative with your favorite toppings.
  5. Bake: Place in the preheated oven and bake for about 25 minutes, or until the top is golden and bubbly.
  6. Serve & Enjoy: Once out of the oven, cut into squares, and serve warm with pizza sauce for dipping. Enjoy every cheesy bite!

How to Serve Low Carb Pizza Squares

Here are some creative serving ideas for your Low Carb Pizza Squares:

  • As an Appetizer: Serve them on a platter with a variety of dipping sauces like ranch, marinara, or a spicy sriracha mayo.
  • With a Side Salad: Pair them with a fresh side salad dressed in balsamic vinaigrette for a balanced meal.
  • In Lunchboxes: These savory squares make a fantastic lunch option, easy to pack and perfect for on-the-go munching.

How to Store Low Carb Pizza Squares

To maintain the freshness of your Low Carb Pizza Squares:

  • Refrigeration: Store any leftovers in an airtight container in the refrigerator. They can last up to 3-4 days.
  • Freezing: For longer storage, freeze the squares. Lay them flat in a single layer on a baking sheet for a couple of hours, then transfer them to a freezer bag. They can be stored for up to 3 months.
  • Reheating: To reheat, simply pop them in the oven or air fryer until warm, or microwave them for quick access.

Tips to Make Low Carb Pizza Squares Perfectly

Here are some expert tips to elevate your Low Carb Pizza Squares:

  1. Enhance the Flavor: Experiment with different spices, like garlic powder or crushed red pepper, to give your squares an extra kick.
  2. Avoid Overmixing: Be careful not to overmix the base; a gentle fold is sufficient for a good texture.
  3. Choose Quality Ingredients: Using high-quality cheese will greatly enhance the overall flavor and texture of your pizza squares.
  4. Customize Your Toppings: Feel free to add other toppings like olives, bell peppers, or cooked sausage to tailor the recipe to your taste.
  5. Crust Texture: For a crispier texture, let the base bake a few minutes longer before adding toppings.

Variations

Here are a few alternative ways to prepare your Low Carb Pizza Squares:

  • Vegan Option: Substitute cheeses with vegan cheese or a nut-based cheese alternative and use flax eggs as a binder.
  • Gluten-Free Adaptation: Ensure the cheese substitutes you choose are explicitly labeled gluten-free.
  • Keto-Friendly Modifications: Incorporate more veggies like zucchini or spinach to enhance nutrition while keeping within your macros.

Frequently Asked Questions (FAQ)

  • Can I make Low Carb Pizza Squares ahead of time?
  • Absolutely! You can prepare the mixture and spread it on the sheet, then bake just before serving.
  • What are the best substitutes for mozzarella cheese?
  • You could use other high-fat cheeses like cheddar, provolone, or gouda if mozzarella isn’t available.
  • Can I cook this recipe in an air fryer?
  • Yes! Set the air fryer to 320°F (160°C) and bake for about 15-20 minutes, or until crispy and golden.

Conclusion

Low Carb Pizza Squares are not just a recipe; they’re a delightful way to enjoy a classic favorite without the guilt, perfect for anyone craving something cheesy and delicious. With just a handful of ingredients and a few simple steps, you can revive those nostalgic Friday night pizza moments. I encourage you to try this recipe and leave your thoughts in the comments. If you enjoyed it, please rate it and share it on social media to spread the love for low-carb cooking! Your taste buds will thank you.

Keto Chicken Bacon Ranch Casserole

Introduction

There’s something undeniably nostalgic about casseroles. As a child, I remember gathering around the table with my family, eagerly anticipating that bubbling dish pulled from the oven, its aroma beckoning us to dig in.

One of my all-time favorites was a creamy chicken casserole that seamlessly blended flavors and textures. Fast forward to today, and I’m thrilled to present a delicious twist on that beloved classic: the Keto Chicken Bacon Ranch Casserole.

This recipe is more than just a meal; it’s a celebration of flavors and comfort. With tender chicken, crispy bacon, and the creamy goodness of ranch dressing, every bite is a harmony of satisfaction. Whether you’re on a keto diet or simply looking for a healthy, family-friendly dish, this casserole is bound to become your new go-to.

The magic lies in its cheesy, gooey texture, complemented by the crunch of broccoli and the smoky flavor of bacon. It’s a delightful combination that will leave your taste buds dancing and your family asking for seconds!

2. Why Make This Recipe?

You might be wondering, “Why should I make this Keto Chicken Bacon Ranch Casserole?” Here are three irresistible reasons to give this dish a try:

  • Easy and Quick to Make: This casserole comes together in under 30 minutes of prep time, and with minimal cook time, you can have a satisfying meal on the table in no time.
  • Budget-Friendly: With simple ingredients that are often found in your pantry or fridge, this dish won’t break the bank. Plus, it’s filling enough to keep everyone satisfied!
  • Family Favorite: The combination of chicken, bacon, and ranch dressing is a hit among both kids and adults. It’s one of those rare recipes that everyone in the family will eagerly devour.

3. How to Make Keto Chicken Bacon Ranch Casserole

Ingredients

Here’s everything you need to whip up this delicious casserole:

Keto Chicken Bacon Ranch Casserole

A cheesy, hearty low-carb casserole loaded with tender chicken, crispy bacon, broccoli, and creamy ranch dressing. Perfect for a comforting keto-friendly dinner that’s quick, easy, and family-approved.

Equipment

  • Casserole dish (9×13 inch)
  • Large mixing bowl
  • Oven
  • Knife and chopping board

Ingredients
  

  • 2 lbs cooked chicken breasts cubed (or rotisserie chicken)
  • 8 slices cooked bacon chopped (or turkey bacon)
  • 3 cloves garlic minced (or 1 tsp garlic powder)
  • 3/4 cup ranch dressing keto-friendly or homemade
  • 1 cup shredded mozzarella cheese
  • 1 cup shredded cheddar cheese or pepper jack
  • 4 cups broccoli florets or low-carb veggie alternative

Instructions
 

  • Preheat oven to 375°F (190°C).
  • In a large bowl, mix chicken, bacon, broccoli, garlic, ranch dressing, and both cheeses.
  • Transfer to a greased casserole dish and spread evenly.
  • Bake for 20 minutes or until the cheese is bubbly and golden.
  • Let cool slightly before serving.

Notes

Use rotisserie chicken to save prep time.
Add spices like paprika or Italian herbs for a flavor boost.
Slightly steam broccoli beforehand to keep it tender-crisp.
Keeps well in the fridge for 3 days or freeze up to 2 months.
Reheat at 350°F for 15–20 minutes or microwave single portions.
Estimated Nutrition per Serving (based on 6 servings):
Calories: ~420
Fat: ~32g
Protein: ~30g
Carbs: ~5g (Net carbs: ~3g)
Fiber: ~2g

Directions

Follow these simple steps to create your Keto Chicken Bacon Ranch Casserole:

  1. Preheat Your Oven: Set your oven to 375°F (190°C) while you prepare the casserole.
  2. Mix Ingredients: In a large casserole dish, combine the cooked chicken, chopped bacon, broccoli florets, minced garlic, ranch dressing, and both kinds of cheese. Stir until everything is well coated and evenly mixed.
  3. Bake: Place the casserole in the preheated oven and bake for about 20 minutes. You want to bake until the cheese is melted and bubbly, creating a delicious crust on top.
  4. Serve and Enjoy: Once it’s out of the oven, let it cool for a few minutes before serving. Enjoy your delicious casserole!

4. How to Serve Keto Chicken Bacon Ranch Casserole

This dish is perfect on its own, but you can elevate your dining experience with these serving suggestions:

  • Pair with a Salad: A fresh side salad with mixed greens, cherry tomatoes, and a light vinaigrette complements the richness of the casserole.
  • Drinks: Consider serving with sparkling water or a light low-carb beverage to cleanse your palate.
  • Presentation Tips: Serve directly from the casserole dish for a rustic look, garnished with fresh herbs like parsley for a pop of color.

5. How to Store Keto Chicken Bacon Ranch Casserole

Storing your leftovers properly ensures you can enjoy this dish for days. Here’s how:

  • Refrigeration: Place unconsumed casserole in an airtight container and store in the fridge for up to 3 days.
  • Freezing: For longer storage, freeze the casserole in a freezer-safe container for up to 2 months.
  • Reheating: When ready to eat, thaw if frozen, and reheat in the oven at 350°F (175°C) until warmed through, about 15-20 minutes. You can also microwave individual portions for quicker reheating.

6. Tips to Make Keto Chicken Bacon Ranch Casserole Perfectly

Want to take your casserole to the next level? Here are some pro tips:

  • Enhance Flavor: Experiment with adding spices like paprika or Italian seasoning for an extra kick in flavor.
  • Avoid Common Mistakes: Ensure the broccoli is cooked but still crisp before baking to maintain its texture.
  • Best Texture: Be cautious not to overbake, as it can lead to dry chicken. Keep an eye on the cheese; once it’s bubbly, it’s done!
  • Add Variety: Feel free to switch up the veggies. Spinach, bell peppers, or even zucchini can give your casserole a fresh twist!

7. Variations

Looking to mix things up? Here are a few variations you can try:

  • Vegan or Vegetarian Version: Substitute chicken with chickpeas or tofu and use vegan cheese. Replace the ranch dressing with a homemade plant-based version.
  • Gluten-Free Adaptation: This recipe is already gluten-free! Just ensure your ranch dressing is certified gluten-free.
  • Low-Carb or Keto-Friendly Modifications: This recipe is perfect for low-carb diets as is. Just be mindful of the ranch dressing brand you choose!

8. Frequently Asked Questions (FAQ)

Can I make Keto Chicken Bacon Ranch Casserole ahead of time?

Absolutely! You can prepare the casserole a day ahead. Just store it in the refrigerator before baking. When ready, pop it in the oven!

What are the best substitutes for ranch dressing?

You can use Greek yogurt mixed with herbs for a healthier option or try a homemade ranch dressing using mayo, buttermilk, and spices.

Can I cook this recipe in an air fryer?

Yes! Preheat your air fryer to 360°F (182°C) and cook the casserole for about 15-18 minutes, or until the cheese is melted and bubbly.

9. Conclusion

The Keto Chicken Bacon Ranch Casserole is not just a meal; it’s an experience that brings the family together, combining comfort food with healthy ingredients. With its easy preparation and rich flavors, this dish is sure to be a winner in your kitchen.

So why not grab those ingredients and give it a try? I’d love to hear how it turns out for you! Please leave a comment, share your thoughts, and don’t forget to rate the recipe. If you enjoy it, share it on social media to spread the joy of this delicious, low-carb comfort food!

Crock Pot Sun Dried Tomato Chicken

1. Introduction

Imagine walking in after a long day, greeted by the irresistible aroma of a meal that practically cooks itself. That warmth and comfort is exactly what my Crock Pot Sun Dried Tomato Chicken brings to the table.

This recipe isn’t just about the food; it’s about creating those cherished moments with family and friends, all while enjoying a burst of Mediterranean flavors in every bite.

With tender chicken, tangy sun-dried tomatoes, and a touch of Italian herbs, this dish stands out for its robust flavors without requiring hours of your precious time. You’ll love how the zesty tomatoes meld with the juicy chicken, resulting in an easy yet exquisite meal that feels gourmet. Let’s dive into why you should add this recipe to your weekly meal rotation!

2. Why Make This Recipe?

Here are a few compelling reasons why Crock Pot Sun Dried Tomato Chicken is worth a try:

  • Easy and Quick to Make: With minimal prep and one-pot cooking, dinner doesn’t get simpler than this.
  • Budget-Friendly: Utilizing basic ingredients, this dish is both delicious and economical.
  • Family Favorite: Its rich flavor makes it a hit among both kids and adults, ensuring everyone cleans their plates.
  • Healthy and Diet-Friendly: Packed with protein and veggies, this dish is a sensible choice for health-conscious diners.
  • Versatile: You can easily customize it to fit various dietary needs or preferences.

3. How to Make Crock Pot Sun Dried Tomato Chicken

Ingredients

Crock Pot Sun Dried Tomato Chicken

A cozy, slow-cooked chicken dish packed with Mediterranean flavors like sun-dried tomatoes and Italian herbs. Quick to prepare, comforting to eat — perfect for busy weeknights.

Equipment

  • Crock Pot (slow cooker)
  • Measuring cups
  • Measuring spoons
  • Mixing spoon or spatula
  • Knife (to chop optional veggies)
  • Cutting board

Ingredients
  

  • 4 boneless skinless chicken breasts
  • 1 cup sun-dried tomatoes in oil
  • 1 cup low-sodium chicken broth
  • 1 teaspoon Italian seasoning or fresh herbs
  • Salt to taste
  • Pepper to taste
  • 1 cup fresh spinach optional
  • Parmesan cheese for serving, optional

Instructions
 

  • Place the chicken breasts at the bottom of your crock pot.
  • Add the sun-dried tomatoes with their oil and pour in the chicken broth.
  • Sprinkle Italian seasoning over the top. Season with salt and pepper.
  • Cover and cook on LOW for 6–7 hours or on HIGH for 3–4 hours, until the chicken is fully cooked and tender.
  • (Optional) Add fresh spinach during the last 30 minutes of cooking and allow it to wilt.
  • Serve hot, topped with grated Parmesan cheese if desired. Enjoy!

Notes

Flavor Boost: Add crushed garlic or a splash of balsamic vinegar for extra depth.
Creamy Option: Stir in a spoonful of cream cheese or Greek yogurt before serving for a richer sauce.
Serving Ideas: Serve over rice, quinoa, in wraps, or with a fresh garden salad.
Storage: Store leftovers in an airtight container in the refrigerator for up to 4 days, or freeze for up to 3 months.
Vegetable Variations: Add mushrooms or bell peppers for extra flavor and nutrition.
Gluten-Free: Naturally gluten-free — just ensure broth is certified GF if needed.
Nutrition Facts (per serving, estimated based on 4 servings):
Calories: 320 kcal
Protein: 35 g
Fat: 16 g
Saturated Fat: 4 g
Carbohydrates: 8 g
Fiber: 2 g
Sugar: 4 g
Sodium: 580 mg

Directions

  1. Prepare the Slow Cooker: Begin by placing the chicken breasts in the bottom of your crock pot.
  2. Add Ingredients: Pour in the sun dried tomatoes along with their oil, and the chicken broth. Sprinkle Italian seasoning on top, then season with salt and pepper to your liking.
  3. Cover and Cook: Cover the crock pot with its lid and set to cook on low for 6-7 hours. If you’re short on time, cook on high for 3-4 hours. The chicken should be thoroughly cooked and incredibly tender.
  4. Add Spinach: If you wish, toss in fresh spinach during the last 30 minutes of cooking. It will wilt perfectly while adding an extra boost of nutrients and a splash of color.
  5. Serve: Once cooked, serve the chicken topped with a generous sprinkle of Parmesan cheese. Enjoy the luscious, aromatic flavors!

4. How to Serve Crock Pot Sun Dried Tomato Chicken

To elevate your meal, consider these serving ideas:

  • Over Rice or Quinoa: The savory sauce from the chicken works beautifully with a fluffy bed of rice or nutty quinoa.
  • In a Wrap: Shred the chicken and serve it in a whole-wheat wrap with fresh veggies for a tasty lunch option.
  • With a Side Salad: A garden salad with a light vinaigrette pairs perfectly to balance the richness of the dish.

5. How to Store Crock Pot Sun Dried Tomato Chicken

Proper storage will keep your dish delicious for days.

  • Refrigeration: Store any leftovers in an airtight container in the refrigerator for up to 4 days.
  • Freezing: For longer storage, you can freeze the chicken in a freezer-safe container for up to 3 months. Just remember to thaw it in the refrigerator overnight before reheating.
  • Reheating: Gently reheat in the microwave or on the stove, adding a splash of chicken broth if needed to prevent drying out.

6. Tips to Make Crock Pot Sun Dried Tomato Chicken Perfectly

Here are a few expert tips to ensure your dish turns out flawlessly every time:

  • Enhance Flavor: Experiment with adding crushed garlic or a splash of balsamic vinegar for deeper flavor.
  • Avoid Overcooking: If your crock pot tends to run hot, check the chicken for doneness earlier to prevent it from drying out.
  • Texture Tips: For a creamier sauce, stir in a bit of cream cheese or Greek yogurt at the end of cooking.
  • Vegetable Variations: Try adding bell peppers or mushrooms for added flavors and textures.
  • Use Fresh Herbs: Fresh basil or parsley sprinkled on top just before serving brightens the dish beautifully.

7. Variations (If Any)

Here are a few alternative versions of this dish:

  • Vegan or Vegetarian Version: Substitute the chicken with firm tofu or chickpeas, and use vegetable broth.
  • Gluten-Free Adaptation: This dish is naturally gluten-free; just ensure any broth or added ingredients are certified gluten-free.
  • Low-Carb or Keto-Friendly Modifications: Serve over cauliflower rice instead of traditional rice to keep carbs in check.

8. Frequently Asked Questions (FAQ)

Can I make Crock Pot Sun Dried Tomato Chicken ahead of time? Yes! This dish actually benefits from being made ahead since the flavors can continue to meld.

What are the best substitutes for sun dried tomatoes? If you can’t find sun dried tomatoes, roasted red peppers or fresh tomatoes can work, though the flavor will differ slightly.

Can I cook this recipe in an air fryer? While it’s not ideal for this specific recipe, you can adapt it by using the air fryer for a quicker cooking time, but the flavors may not meld the same.

9. Conclusion

Crock Pot Sun Dried Tomato Chicken is more than just a recipe; it’s an invitation to create delicious memories with your loved ones. Its blend of flavors, ease of preparation, and comforting qualities make it a dish you’ll turn to again and again.

I encourage you to try this recipe, and I’d love to hear how it turns out for you! Feel free to leave a comment or a rating based on your experience. Don’t forget to share the joy of cooking by posting about it on social media! Enjoy every bit of it!

Chicken Bacon Spinach

Imagine coming home after a long day and the enticing aroma of crispy bacon greets you at the door. That’s the kind of warmth and comfort this Chicken Bacon Spinach dish brings. This recipe blends the savory flavors of chicken, the smokiness of bacon, and the freshness of spinach into one delightful meal.

It’s not just about taste; it’s about creating memories with your family around the dinner table. Whether you’re a busy parent or someone looking to impress at a dinner party, this recipe is special for many reasons.

You’ll love the harmonious balance of textures and flavors—crispy bacon, tender chicken, and wilted spinach topped with rich cheese. It’s unique yet simple, making it a go-to recipe for any occasion.

Why Make This Recipe?

Here are just a few reasons why Chicken Bacon Spinach will quickly become your new favorite dish:

  • Easy and Quick to Make: This meal comes together in about 30 minutes, making it perfect for busy weeknights.
  • Budget-Friendly: Using affordable ingredients like chicken and bacon, this dish won’t break the bank.
  • Family Favorite: With its rich flavors, it’s sure to please even the pickiest eaters at your table.
  • Healthy Option: Packed with protein and vegetables, it’s a dish that balances nutrition with taste.

How to Make Chicken Bacon Spinach

Ingredients

Chicken Bacon Spinach Dish

Summary: A hearty and delicious one-pan chicken recipe featuring crispy bacon and tender spinach — perfect for a comforting dinner.
Prep Time 10 minutes
Cook Time 20 minutes
Total Time 30 minutes
Servings 4 portions

Equipment

  • 🥄 Equipment:
  • Large skillet or pan
  • Tongs
  • Knife
  • Cutting board

Ingredients
  

  • 🛒 Ingredients:
  • 4 boneless skinless chicken breasts
  • 6 slices bacon chopped
  • 2 cups fresh spinach
  • 1 tablespoon olive oil
  • 2 cloves garlic minced
  • 1/2 cup heavy cream
  • 1/2 cup chicken broth
  • 1/2 cup grated Parmesan cheese
  • Salt and pepper to taste

Instructions
 

  • 👩‍🍳 Instructions:
  • Heat a large skillet over medium heat. Add chopped bacon and cook until crispy. Remove bacon and set aside, leaving some bacon fat in the skillet.
  • Season chicken breasts with salt and pepper. In the same skillet, add olive oil if needed and sear the chicken breasts until golden brown on each side and cooked through. Remove chicken and set aside.
  • In the same skillet, add minced garlic and sauté for 30 seconds until fragrant.
  • Pour in chicken broth and heavy cream, scraping the bottom of the pan to deglaze. Let it simmer for a few minutes.
  • Stir in Parmesan cheese until melted and sauce slightly thickens.
  • Add spinach and cook until wilted.
  • Return chicken and bacon to the skillet. Spoon sauce over the chicken and simmer for another 2–3 minutes.
  • Serve hot and enjoy!

Notes

📋 Notes:
You can substitute chicken thighs for chicken breasts if preferred.
Add a pinch of red pepper flakes for a spicy kick.
Serve with pasta, rice, or mashed potatoes for a complete meal.
🔥 Nutrition Information (per serving):
Serving: 1 portion
Calories: 520 kcal
Carbohydrates: 6 g
Protein: 42 g
Fat: 36 g
Fiber: 1 g

Directions

  1. Start by cooking the bacon until it’s nice and crispy. Once done, set it aside on a paper towel to drain.
  2. While the bacon cools, cut the chicken into 1-2 inch cubes and cook in a skillet over medium heat until thoroughly cooked, about 5-7 minutes.
  3. Add the minced garlic and fresh spinach to the skillet, cooking until the spinach has wilted down, about 2-3 minutes.
  4. Once everything is well combined, drizzle some ranch dressing over the top, then crumble the bacon and sprinkle your choice of Italian cheese over it.
  5. Transfer the skillet to a preheated oven at 375°F (190°C) and bake for about 20 minutes, until the cheese is bubbly and golden.
  6. Take it out of the oven, let it cool slightly, and enjoy this delicious combo!

How to Serve Chicken Bacon Spinach

For a well-rounded meal, consider these serving ideas:

  • Pair with a light salad, like arugula with lemon vinaigrette, to balance the richness of the dish.
  • Serve alongside roasted vegetables for an added nutritional punch.
  • A glass of chilled white wine, such as Sauvignon Blanc, can complement the flavors beautifully.

How to Store Chicken Bacon Spinach

To keep your Chicken Bacon Spinach fresh:

  • Refrigeration: Store leftovers in an airtight container in the refrigerator for up to 3 days.
  • Freezing: For longer storage, freeze portions in an airtight container for up to 3 months. To reheat, thaw in the fridge overnight and bake in the oven until warmed through.
  • Reheating: Reheat in the oven or on the stovetop until heated thoroughly, ensuring the cheese doesn’t get overcooked.

Tips to Make Chicken Bacon Spinach Perfectly

  1. Enhance Flavor: Add a dash of lemon juice or zest before serving for a fresh kick.
  2. Common Mistakes: Avoid overcooking the chicken; it should be juicy and tender.
  3. Cooking Techniques: Sear the chicken well for a golden crust, which adds both flavor and texture.
  4. Cheese Choices: Experiment with different cheeses, such as feta or gouda, for varied flavors.
  5. Make It Creamy: For a creamier texture, stir in a splash of cream or cream cheese before baking.

Variations (If Any)

This delicious recipe can be adapted to suit different dietary needs:

  • Vegan Version: Substitute chicken with chickpeas or tofu, and use a vegan bacon alternative.
  • Gluten-Free: Ensure that your ranch dressing is gluten-free if needed.
  • Low-Carb or Keto-Friendly: Skip the ranch dressing and use a low-carb sauce.

Frequently Asked Questions (FAQ)

Can I make Chicken Bacon Spinach ahead of time?

Yes! You can prepare the chicken and spinach and store them separately. Combine and bake just before serving for the best results.

What are the best substitutes for ranch dressing?

You can use a homemade yogurt-based dressing or any creamy dressing of your choice like Blue cheese or Caesar.

Can I cook this recipe in an air fryer?

Absolutely! Cook the chicken and bacon separately in the air fryer and then combine them with spinach and cheese for a quick and delicious meal.

Conclusion

In conclusion, Chicken Bacon Spinach is a delightful dish that combines simplicity, flavor, and comfort in one pot. You have the perfect recipe for a quick weeknight dinner that will make your family happy. We encourage you to try it out and share your thoughts! Whether you modify it or follow it step-by-step, we want to hear about your experiences. Don’t forget to leave a comment, rate the recipe, or share it on social media with your friends. Enjoy your cooking adventure!

One-Pan Keto Chicken with Cheese

1. Introduction

If you’ve ever craved a comforting meal that’s quick, satisfying, and aligns with your dietary goals, then this One-Pan Keto Chicken with Cheese is just what you need.

Picture this: tender chicken breasts enveloped in a rich, creamy cheese sauce that melts in your mouth. This dish not only resonates with my childhood memories of family dinners, but it also brings the joy of simple cooking to the table with minimal clean-up! With its delightful flavors and creamy texture, you’ll understand why this recipe is a must-try.

2. Why Make This Recipe?

Here are a few reasons why One-Pan Keto Chicken with Cheese should be on your dinner menu:

  • Easy and Quick: Perfect for busy weeknights, this dish comes together in under 30 minutes.
  • Budget-friendly: Using simple, accessible ingredients makes this dish kind to your wallet.
  • Family Favorite: Packed with flavor that appeals to both kids and adults, making it a crowd-pleaser.
  • Healthy Option: Low in carbs and high in protein, it makes for a perfect keto meal without sacrificing taste.

3. How to Make One-Pan Keto Chicken with Cheese

One-Pan Keto Chicken with Cheese

A simple and delicious one-pan keto recipe featuring juicy chicken smothered in melted cheese. Perfect for a quick low-carb dinner!
Prep Time 5 minutes
Cook Time 15 minutes
Total Time 20 minutes
Servings 4 people

Equipment

  • Large skillet or frying pan
  • Spatula or tongs
  • Knife and cutting board

Ingredients
  

  • Ingredients
  • 4 boneless skinless chicken breasts
  • 1 tablespoon olive oil
  • 1 teaspoon garlic powder
  • 1 teaspoon paprika
  • ½ teaspoon salt
  • ¼ teaspoon black pepper
  • 1 cup shredded mozzarella cheese
  • ½ cup shredded cheddar cheese
  • 2 tablespoons fresh parsley chopped, optional

Instructions
 

  • Instructions
  • Heat the olive oil in a large skillet over medium heat.
  • Season the chicken breasts with garlic powder, paprika, salt, and pepper.
  • Add the chicken to the skillet and cook for 5–7 minutes on each side, or until fully cooked and golden brown.
  • Reduce the heat to low. Sprinkle mozzarella and cheddar cheese evenly over the chicken breasts.
  • Cover the skillet with a lid and cook for 2–3 minutes, or until the cheese is fully melted.
  • Garnish with chopped parsley if desired.
  • Serve hot and enjoy!

Notes

Notes
You can substitute the mozzarella and cheddar with your favourite keto-friendly cheeses like provolone or pepper jack.
For extra flavour, add sautéed mushrooms or spinach before sprinkling the cheese.
Ensure internal chicken temperature reaches 165°F (74°C) for safe consumption.

Directions

  1. Heat the Olive Oil: Start by heating the olive oil in a large skillet over medium-high heat. You should hear it sizzle as it warms up!
  2. Season the Chicken: While the oil is warming, season the chicken breasts generously with garlic powder, onion powder, salt, and pepper.
  3. Cook the Chicken: Once the skillet is hot, add the chicken breasts and cook until they’re golden brown on both sides and cooked through—this should take about 6-7 minutes per side.
  4. Add Cream and Cheese: After the chicken is nicely browned, reduce the heat to low. Pour in the heavy cream and sprinkle the shredded cheese on top.
  5. Melt the Cheese: Cover the skillet and let it cook a few more minutes until the cheese is melted and bubbling, about 3-5 minutes.
  6. Garnish and Serve: Finally, garnish with freshly chopped parsley before serving. You’re all set to enjoy this creamy, cheesy delight!

4. How to Serve One-Pan Keto Chicken with Cheese

Here are a few ideas to elevate your meal:

  • With a Side Salad: Pair this dish with a fresh garden salad topped with a light vinaigrette for a refreshing contrast.
  • Over Zoodles: Serve over zucchini noodles (zoodles) for a fun, low-carb twist.
  • Wine Pairing: A crisp Chardonnay or a sparkling water with lemon can complement the richness of the chicken beautifully.

5. How to Store One-Pan Keto Chicken with Cheese

To keep your One-Pan Keto Chicken fresh:

  • Refrigeration: Store leftovers in an airtight container in the refrigerator for up to 3 days.
  • Freezing: To freeze, place the cooled chicken in a freezer-safe container for up to 3 months. To reheat, simply thaw overnight in the refrigerator and warm gently in the skillet or microwave.

6. Tips to Make One-Pan Keto Chicken with Cheese Perfectly

  • Choose Quality Chicken: Opt for organic or free-range chicken breasts for superior flavor and texture.
  • Cheese Variety: Experiment with different types of cheese like fontina or gouda for unique flavor profiles.
  • Avoid Overcooking: Make sure not to overcook the chicken to keep it juicy.
  • Season Generously: Don’t skimp on seasoning; it enhances the overall taste of the dish.

7. Variations

Feel free to customize this dish:

  • Vegan Version: Substitute chicken with tempeh or tofu, and use cashew cream mixed with nutritional yeast as a cheese alternative.
  • Gluten-Free Adaptation: This recipe is naturally gluten-free, but always check your cheese and cream labels.
  • Spiced Up: Add diced jalapeños or cayenne pepper for a spicy kick!

8. Frequently Asked Questions (FAQ)

  • Can I make One-Pan Keto Chicken with Cheese ahead of time? Yes, you can prepare the chicken and sauce in advance and keep it refrigerated until you’re ready to heat it up.
  • What are the best substitutes for heavy cream? You can use coconut cream, evaporated milk, or a dairy-free cream alternative for a lighter or dairy-free version.
  • Can I cook this recipe in an air fryer? Absolutely! Season the chicken and cook it in an air fryer at 375°F for about 20 minutes, then proceed with the cheese sauce separately.

9. Conclusion

One-Pan Keto Chicken with Cheese is a deliciously easy dish that’s perfect for busy weeknights or special occasions. With its creamy texture and rich flavors, it’s sure to win over hearts at your dinner table. I encourage you to try this recipe and share your experience! Don’t forget to leave a comment, rate the recipe, or share it on social media to spread the joy of cooking. Happy cooking!

Krispy Kreme Chaffles

Krispy Kreme Chaffles

What Are Krispy Kreme Chaffles?

If you’ve been following a low-carb or keto lifestyle, you’ve likely encountered chaffles—crispy, waffle-like creations made with cheese and eggs. But have you ever heard of Krispy Kreme Chaffles? These tasty little treats are a twist on the traditional chaffle, inspired by the popular Krispy Kreme doughnuts. Imagine the sweet,

Krispy Kreme Chaffles

indulgent flavour of a Krispy Kreme doughnut, paired with the crispy, fluffy texture of a chaffle. It’s a match made in keto heaven.

Krispy Kreme chaffles are a delicious low-carb alternative to the sugary, high-carb doughnuts you might be craving. By combining the essence of Krispy Kreme with the base of a chaffle, you can satisfy your sweet tooth while staying on track with your keto or low-carb diet.

These chaffles are made with simple ingredients like almond flour, eggs, and mozzarella cheese, creating a doughnut-like experience without all the sugar and carbs. They’re perfect for breakfast, a snack, or a low-carb dessert.

The Benefits of Krispy Kreme Chaffles

1. Perfect for Keto and Low-Carb Diets

The main reason Krispy Kreme chaffles are such a great snack option is because they are keto-friendly. Traditional doughnuts are packed with carbs and sugar, but Krispy Kreme chaffles use ingredients that are low in carbs, such as almond flour and mozzarella cheese. This makes them a suitable option for anyone following a ketogenic or low-carb diet.

2. Satisfies Your Sweet Tooth

Craving a sweet, indulgent treat can be a major challenge when you’re on a keto diet. Krispy Kreme chaffles offer a perfect solution. With their doughnut-inspired flavour, they deliver the sweetness you’re missing without spiking your blood sugar or derailing your diet. They’re a great way to satisfy your sweet cravings while sticking to your macros.

3. Low-Carb and High in Protein

With each chaffle, you’re not just enjoying a guilt-free treat, but you’re also getting a good source of protein. Thanks to the eggs and cheese, Krispy Kreme chaffles are packed with protein, helping you stay full and satisfied for longer. Plus, they’re low in carbs, so they won’t kick you out of ketosis.

4. Versatile and Customisable

Krispy Kreme chaffles are incredibly versatile. You can top them with sugar-free syrups, fresh berries, or even whipped cream to make them more indulgent. You can also get creative with the doughnut flavour by experimenting with spices like cinnamon or vanilla. The possibilities are endless!

How to Make Your Own Krispy Kreme Chaffles

Making Krispy Kreme chaffles at home is easy, and you can enjoy the same delicious taste as the popular doughnuts, but without the carbs. Here’s a simple recipe to get you started.

Ingredients:

IngredientQuantity
Almond Flour1/4 cup
Mozzarella Cheese1/2 cup
Egg1
Baking Powder1/2 tsp
Vanilla Extract1/2 tsp
Sweetener (like Stevia)1-2 tbsp
Cinnamon (optional)1/2 tsp
Sugar-Free Syrup (optional)To taste
Krispy Kreme Chaffles

Instructions:

  1. Preheat Your Waffle Maker: Start by preheating your waffle maker. If you don’t have a waffle maker, you can also use a mini waffle maker for individual chaffles.
  2. Mix the Ingredients: In a bowl, combine the almond flour, mozzarella cheese, egg, baking powder, vanilla extract, sweetener, and cinnamon (if using). Stir until all the ingredients are well combined.
  3. Cook the Chaffles: Pour the batter into your preheated waffle maker. Cook for about 3-5 minutes or until the chaffle is golden brown and crispy.
  4. Top and Serve: Once your Krispy Kreme chaffles are done, remove them from the waffle maker. You can top them with sugar-free syrup, whipped cream, or a sprinkle of cinnamon for an extra touch of sweetness.
  5. Enjoy!: You now have a delicious Krispy Kreme-inspired treat that’s low-carb, keto-friendly, and perfect for any time of day.

Best Store-Bought Krispy Kreme Chaffle Alternatives

If you’re looking for a quick and convenient way to enjoy Krispy Kreme-inspired chaffles, there are some great store-bought options that are keto-friendly. Here are some of the best brands offering keto chaffle alternatives:

1. ChocZero Keto Chaffles

ChocZero offers a line of keto-friendly chaffles that are perfect for satisfying your sweet tooth. Their chaffles are made with high-quality ingredients and are low in carbs, with only 3 grams of net carbs per serving. They have a rich, sweet flavour that mimics the taste of a doughnut, making them an excellent choice for anyone on a keto diet.

Pros:

  • Low-carb
  • Great flavour profile
  • No artificial ingredients

Cons:

  • Slightly higher price point than homemade chaffles

2. Rebel Keto Chaffles

Rebel is known for creating keto-friendly snacks, and their chaffles are no exception. With a doughnut-like texture and sweet, satisfying flavour, Rebel’s chaffles are a great alternative for anyone craving Krispy Kreme-style treats on a low-carb diet.

Pros:

  • Good texture and flavour
  • Low in carbs and sugar
  • Available in multiple flavours

Cons:

  • Not as customizable as homemade options

Nutritional Breakdown of Krispy Kreme Chaffles

When comparing the nutritional information of homemade Krispy Kreme chaffles with store-bought alternatives, it’s important to consider both the calorie count and the macro breakdown.

NutrientHomemade Krispy Kreme ChafflesStore-Bought (ChocZero)
Calories180160
Fat14g12g
Protein10g8g
Carbs (net)3g3g
Fiber2g2g

The nutritional differences are minor, but homemade chaffles offer slightly more protein, which may help you stay fuller for longer. Store-bought chaffles, on the other hand, can be more convenient and are still low-carb and high in fat, making them a suitable option when you’re in a rush.

How to Enjoy Krispy Kreme Chaffles

Krispy Kreme chaffles aren’t just for breakfast. They’re versatile and can be enjoyed in many different ways. Here are a few ideas for incorporating them into your meals:

1. Serve with Sugar-Free Syrup

For a classic doughnut experience, top your Krispy Kreme chaffles with sugar-free maple syrup. This sweet addition will give you that authentic doughnut feeling without the extra carbs.

2. Make a Keto Chaffle Sandwich

You can also use Krispy Kreme chaffles as a base for a low-carb sandwich. Layer them with keto-friendly fillings like bacon, eggs, avocado, or even turkey for a savoury spin on the traditional sweet chaffle.

3. Use as a Dessert Base

For a keto-friendly dessert, you can top your chaffles with whipped cream, fresh berries, or a drizzle of sugar-free chocolate syrup. This is a great option if you want to enjoy a sweet treat without compromising your diet.

4. Create a Keto Chaffle Cake

Stack a few Krispy Kreme chaffles on top of each other, layering them with whipped cream and sugar-free frosting to make a keto-friendly chaffle cake. It’s perfect for birthdays, special occasions, or just when you want something indulgent.


Common Mistakes to Avoid When Making Krispy Kreme Chaffles

When making your own Krispy Kreme chaffles, there are a few common mistakes that can affect the final product. Here’s what to avoid:

  • Using Too Much Almond Flour: Too much almond flour can make your chaffles dense and heavy. Stick to the measurements in the recipe to get the right texture.
  • Overcooking: Overcooking your chaffles can result in a dry, tough texture. Keep an eye on the cooking time and remove them from the waffle maker once they’re golden brown and crispy.
  • Not Preheating the Waffle Maker: Make sure your waffle maker is fully preheated before you add the batter. This ensures that the chaffles cook evenly and have the perfect crispness.
  • Using the Wrong Cheese: Mozzarella is ideal for chaffles because it melts perfectly and creates a fluffy texture. Avoid using cheeses that don’t melt well, like cheddar, as they can affect the final result.

Krispy Kreme Chaffles FAQs

Q: How many carbs are in Krispy Kreme chaffles?

Krispy Kreme chaffles typically contain 3 grams of net carbs per serving, making them a perfect low-carb treat for those on a keto diet.

Q: Can I make Krispy Kreme chaffles with coconut flour instead of almond flour?

Yes, you can use coconut flour as a substitute, but you’ll need to adjust the liquid content, as coconut flour absorbs more moisture than almond flour.

Q: Are Krispy Kreme chaffles gluten-free?

Yes, if you use almond flour and avoid any wheat-based ingredients, Krispy Kreme chaffles are naturally gluten-free.

Q: Can I eat Krispy Kreme chaffles on a low-carb diet?

Absolutely! Krispy Kreme chaffles are a great way to enjoy a doughnut-inspired treat while sticking to your low-carb or keto diet.


Conclusion: Enjoying Krispy Kreme Chaffles Guilt-Free

Whether you’re following a keto diet or simply looking for a healthier way to enjoy the taste of Krispy Kreme doughnuts, Krispy Kreme chaffles are the perfect solution. They’re low-carb, high in protein, and versatile enough to be enjoyed in a variety of ways.

Ready to indulge in a keto-friendly doughnut experience? Give Krispy Kreme chaffles a try, and enjoy a guilt-free treat that satisfies your sweet tooth.

Call to Action: If you loved this guide, why not try making your own Krispy Kreme chaffles today? Share your creative toppings or favourite ways to enjoy them in the comments below! We’d love to see how you’re making these delicious chaffles your own!